How to create S3 bucket on AWS & Get Credentials
- Here’s a simple step-by-step guide to help you create an S3 bucket on AWS and get the access credentials.
- The official AWS documentation for creating an S3 bucket click here
- Sign in to the AWS Management Console, then go to the Amazon S3 Console using this link: https://console.aws.amazon.com/s3/
- Once you're logged into your AWS account, you'll see the main dashboard where you can explore various AWS services.
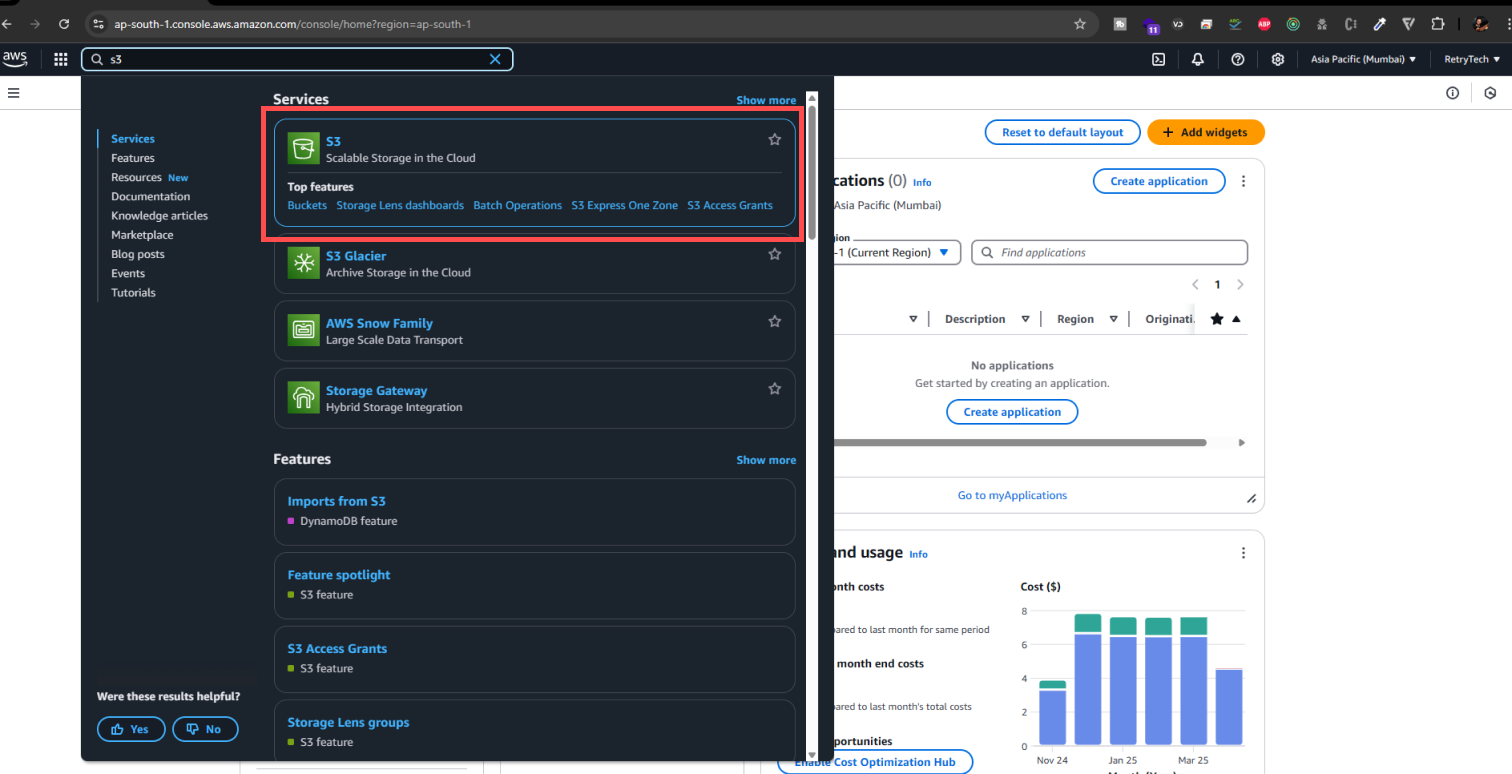
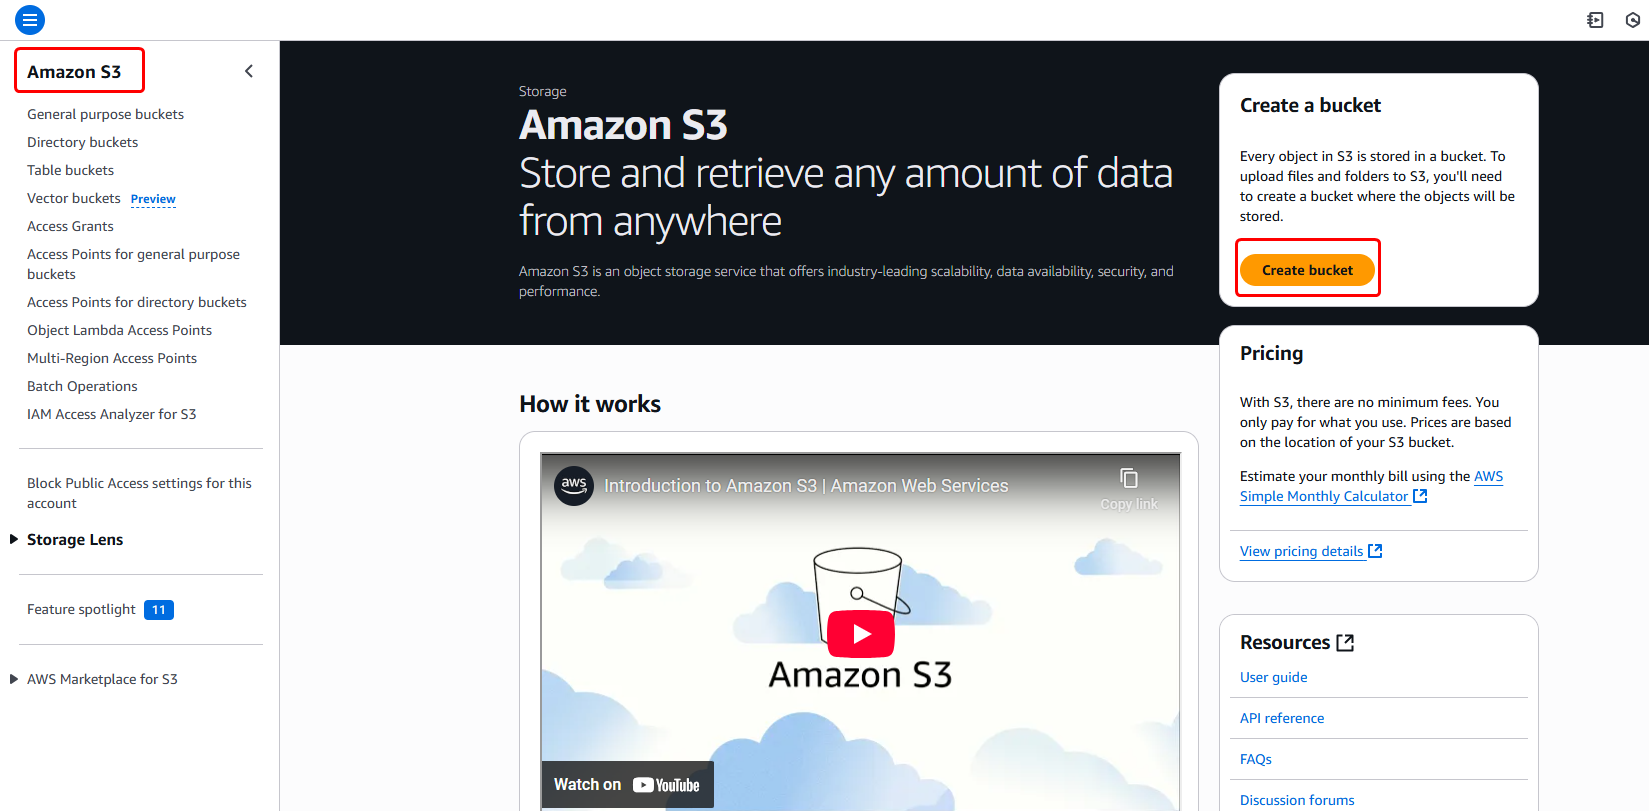
- In the top search bar, type “S3”, and you'll see Amazon S3 appear in the search results (as shown in the image below). Click on it to open the S3 console.
- Now, click the "Create bucket" button located at the top right corner of the S3 console (as shown in the image below).
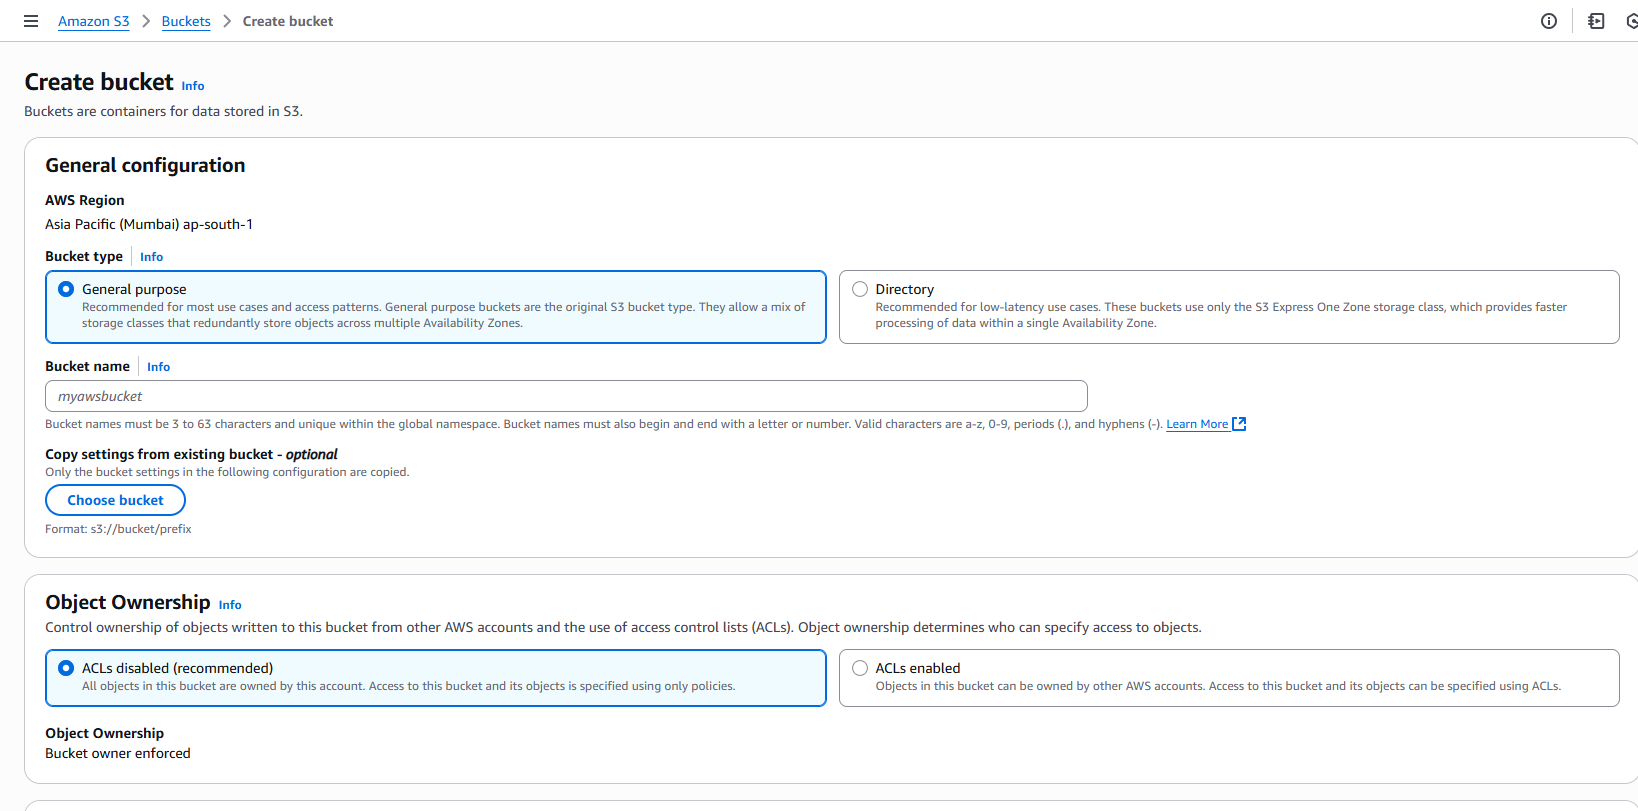
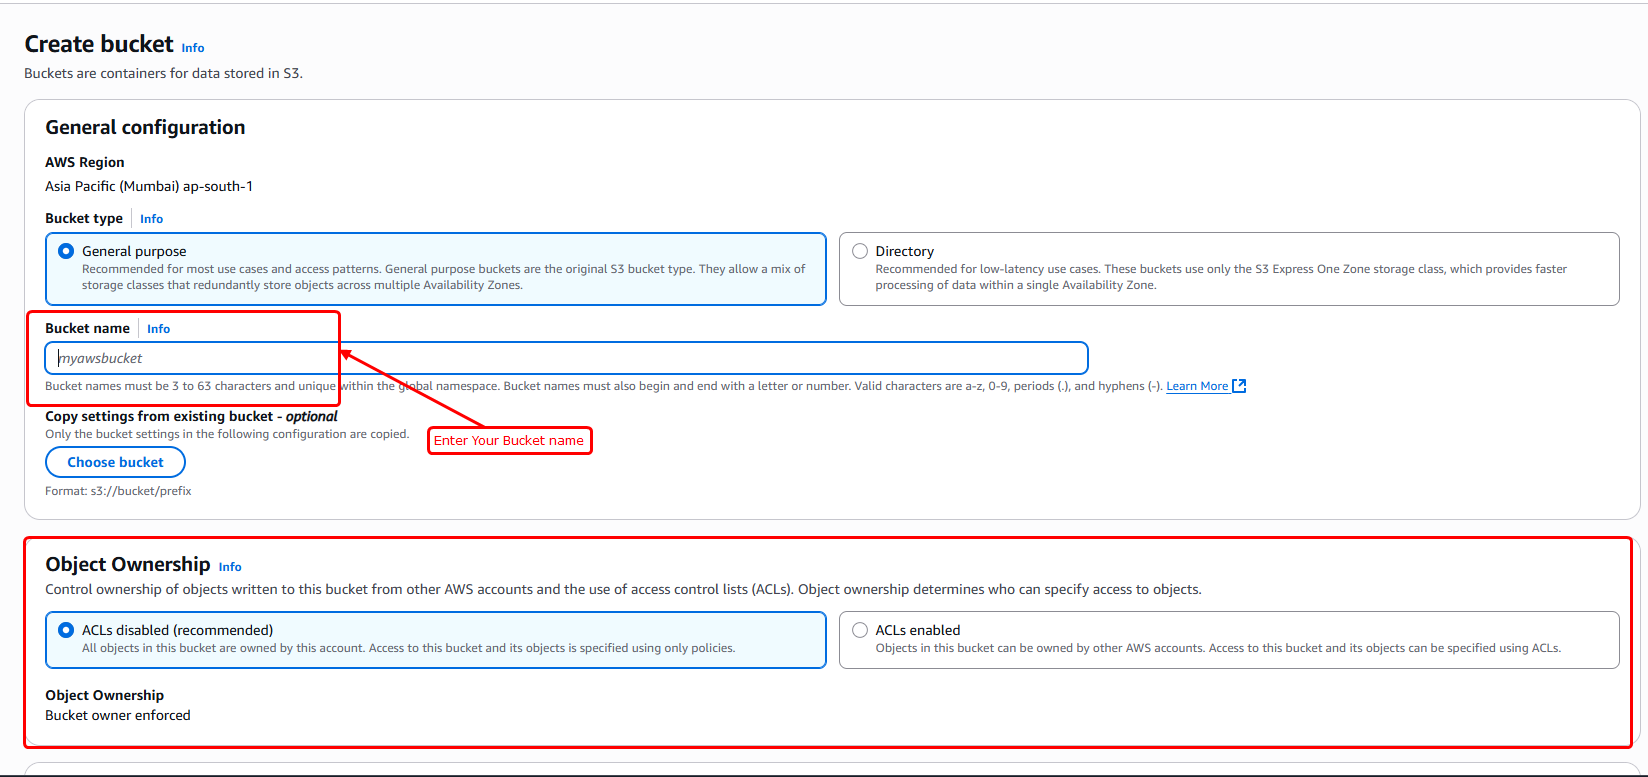
- This will open a setup wizard to create a new bucket, where you'll need to fill in a few details like the bucket name.
- The bucket name must be globally unique and should not be the same as your project name.
- Select the "ACLs disabled" option.
- Then, scroll down to see more settings.
- Then, uncheck all the checkboxes under "Block Public Access settings for this bucket" to allow public access.
- Next, a confirmation checkbox will appear. Check this box to confirm your changes (refer to the image below for guidance).
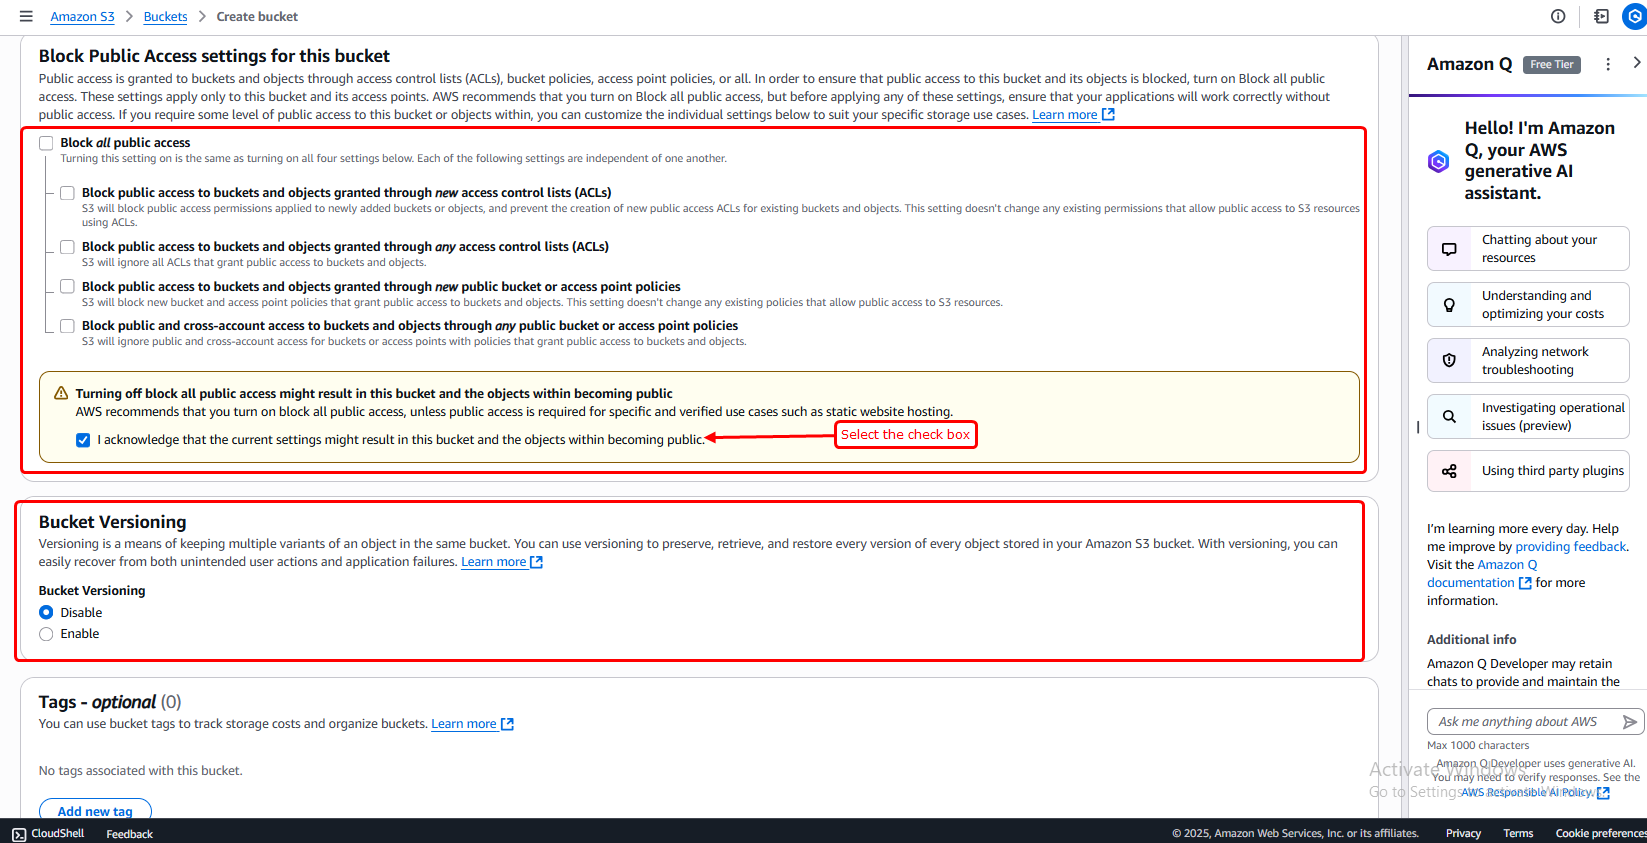
- Don’t change anything else on this page—just leave the other settings as they are.
- Then scroll down and click the "Create bucket" button to finish setting it up.

- After the bucket is created, you’ll be taken to a new page. You’ll see a green success message at the top, and your newly created bucket will appear in the list below.
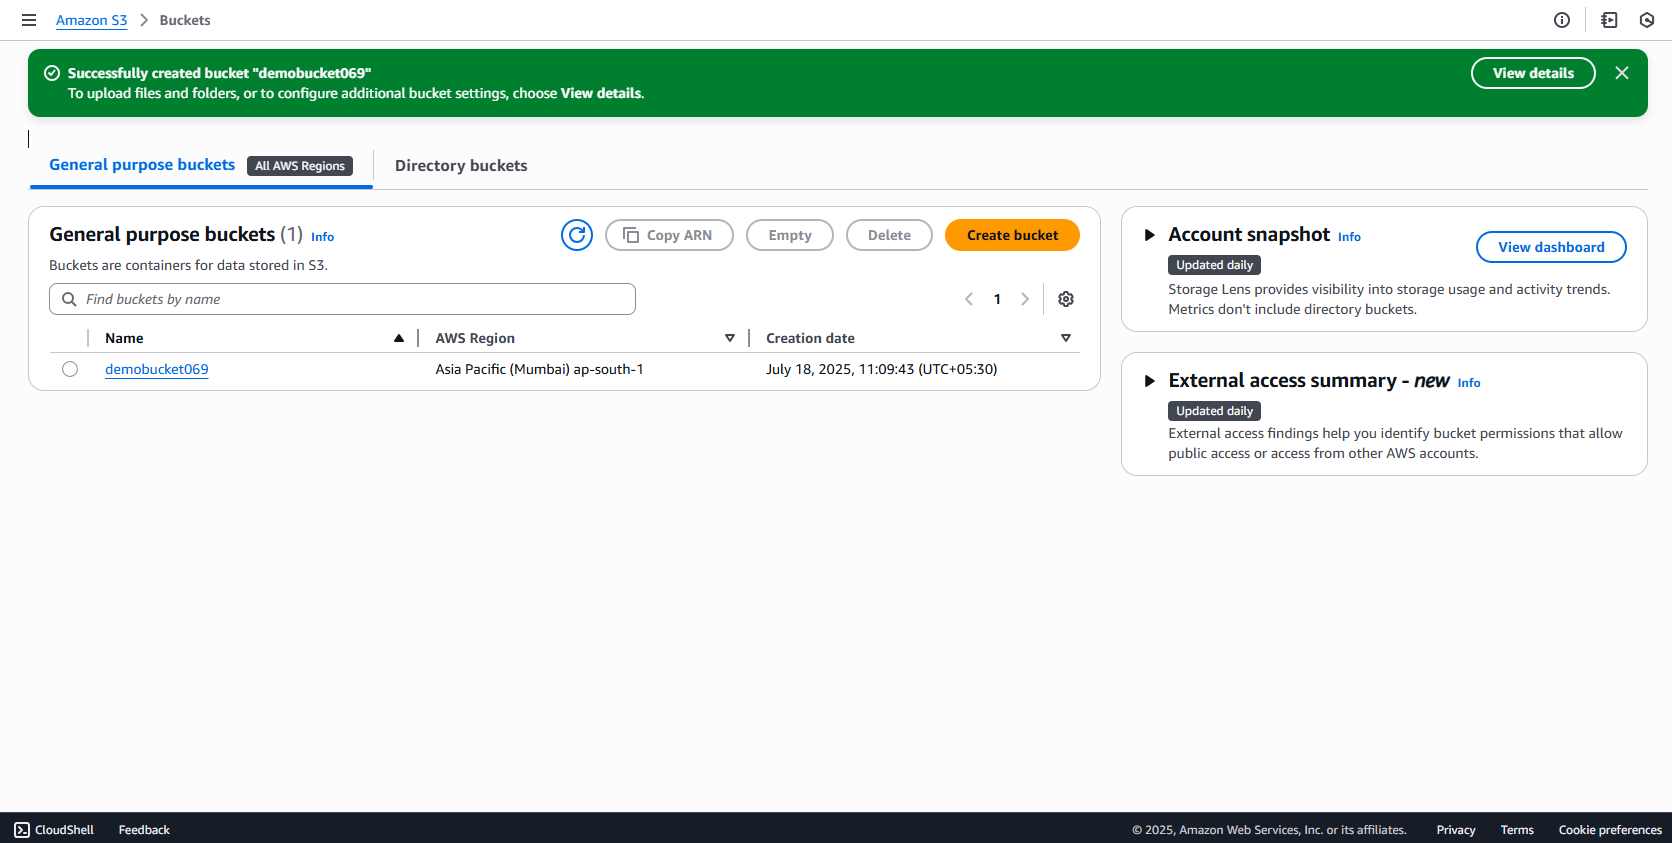
- Click on the bucket name from the list, then go to the "Permissions" tab to manage access settings.
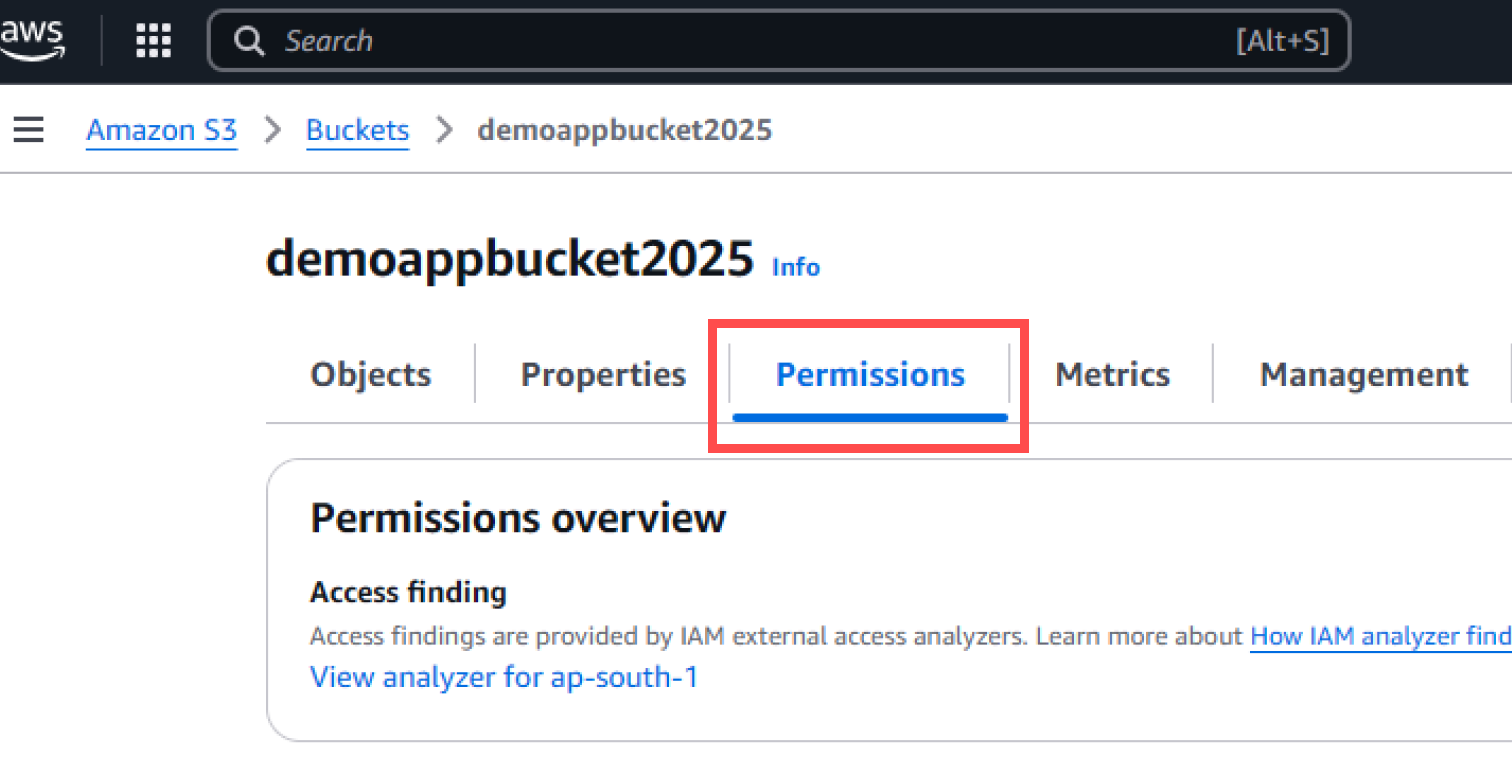
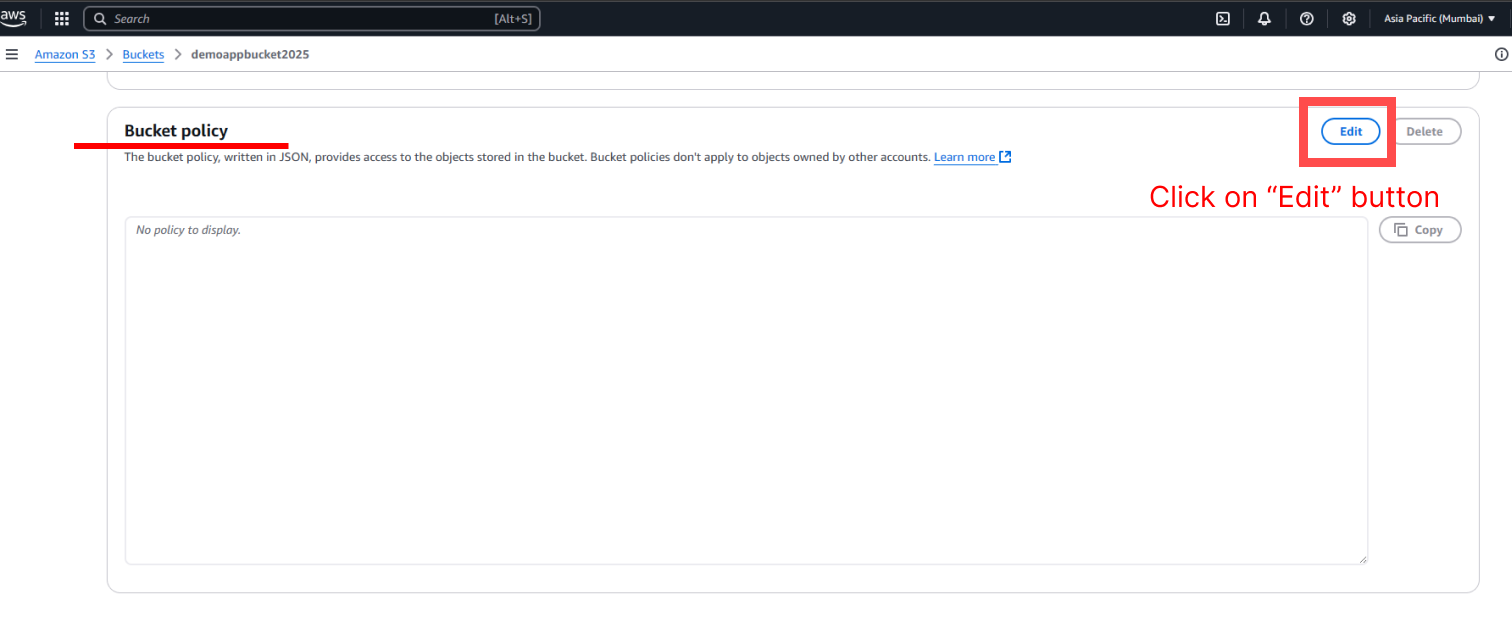
- Then, scroll down until you find the "Bucket policy" section under the Permissions tab.
- Click on the "Edit" button next to the Bucket policy section to add or update the policy.
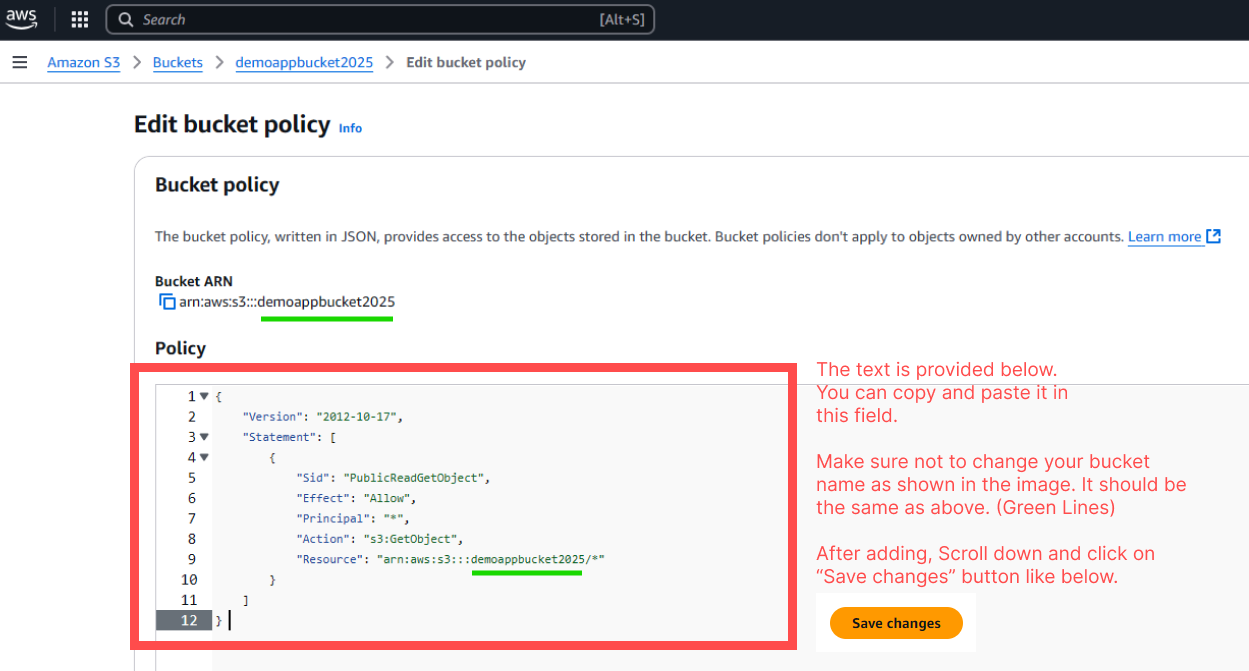
- We’ll add a few lines of text (bucket policy) in that field. The policy is provided below.
- Make sure to update the bucket name in the policy exactly as shown in the example image (highlighted in green). It must match your actual bucket name.
- After adding the policy, scroll down and click the "Save changes" button to apply it.
- Now, we need to get the necessary AWS credentials.
- AWS_BUCKET_NAME
- AWS_REGION
- AWS_ENDPOINT
- AWS_HOSTNAME
- AWS_ACCESS_KEY_ID
- AWS_SECRET_ACCESS_KEY
- Please follow the steps below to get the credentials mentioned above. These will allow your project to securely access the S3 bucket.
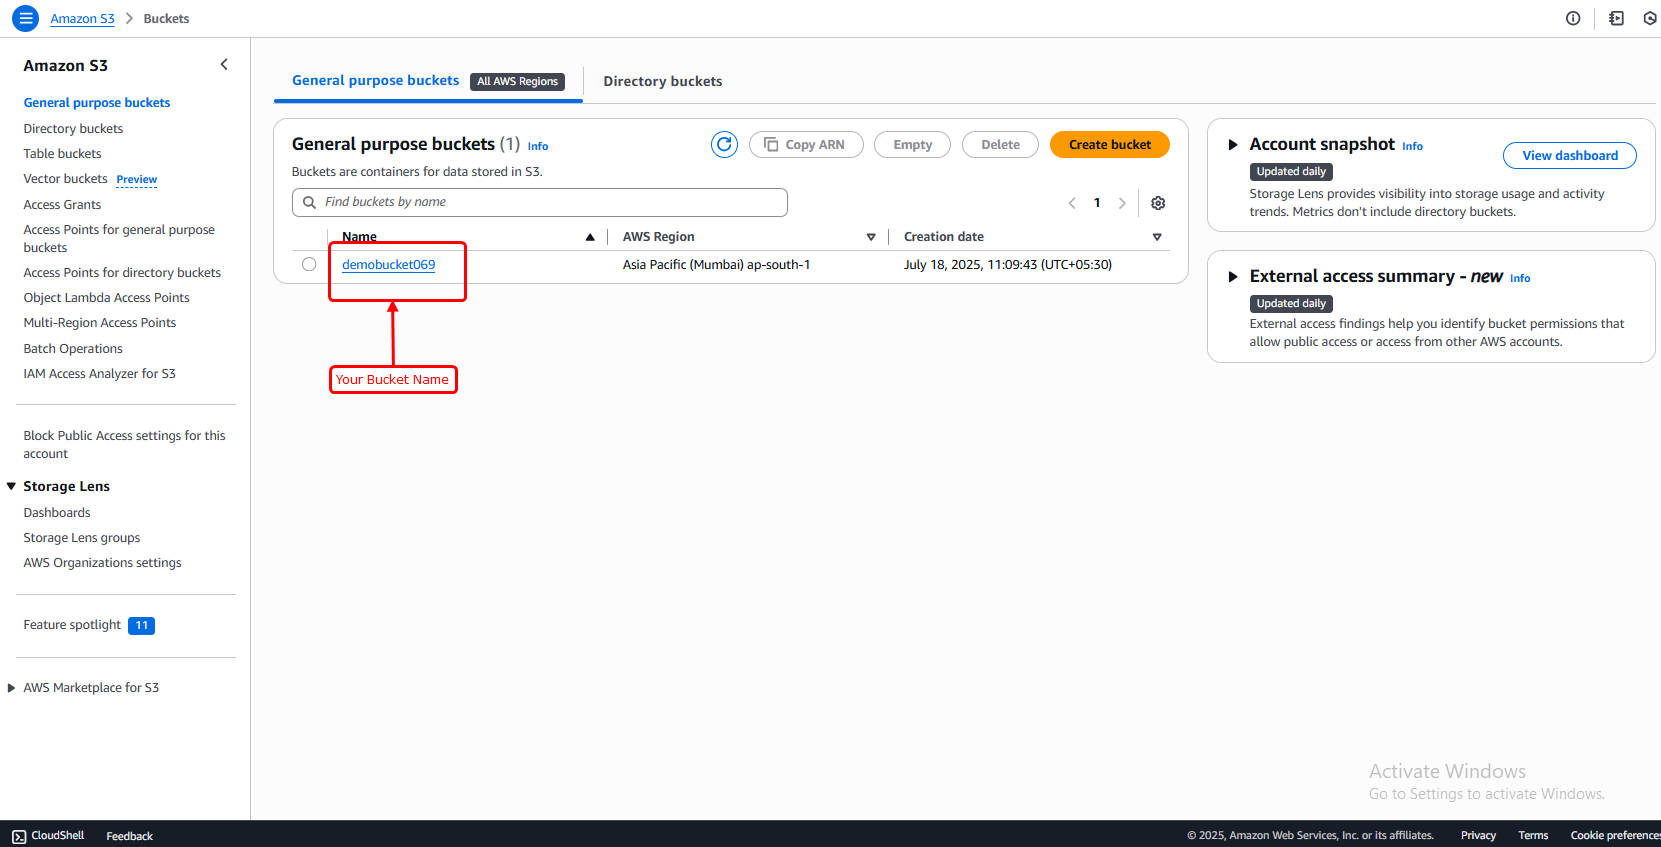
- Go to the S3 section in your AWS account.
- You’ll see your bucket listed there.
- From this page, you can find:
- AWS_BUCKET (your bucket name)
- AWS_REGION (the region where the bucket is hosted)
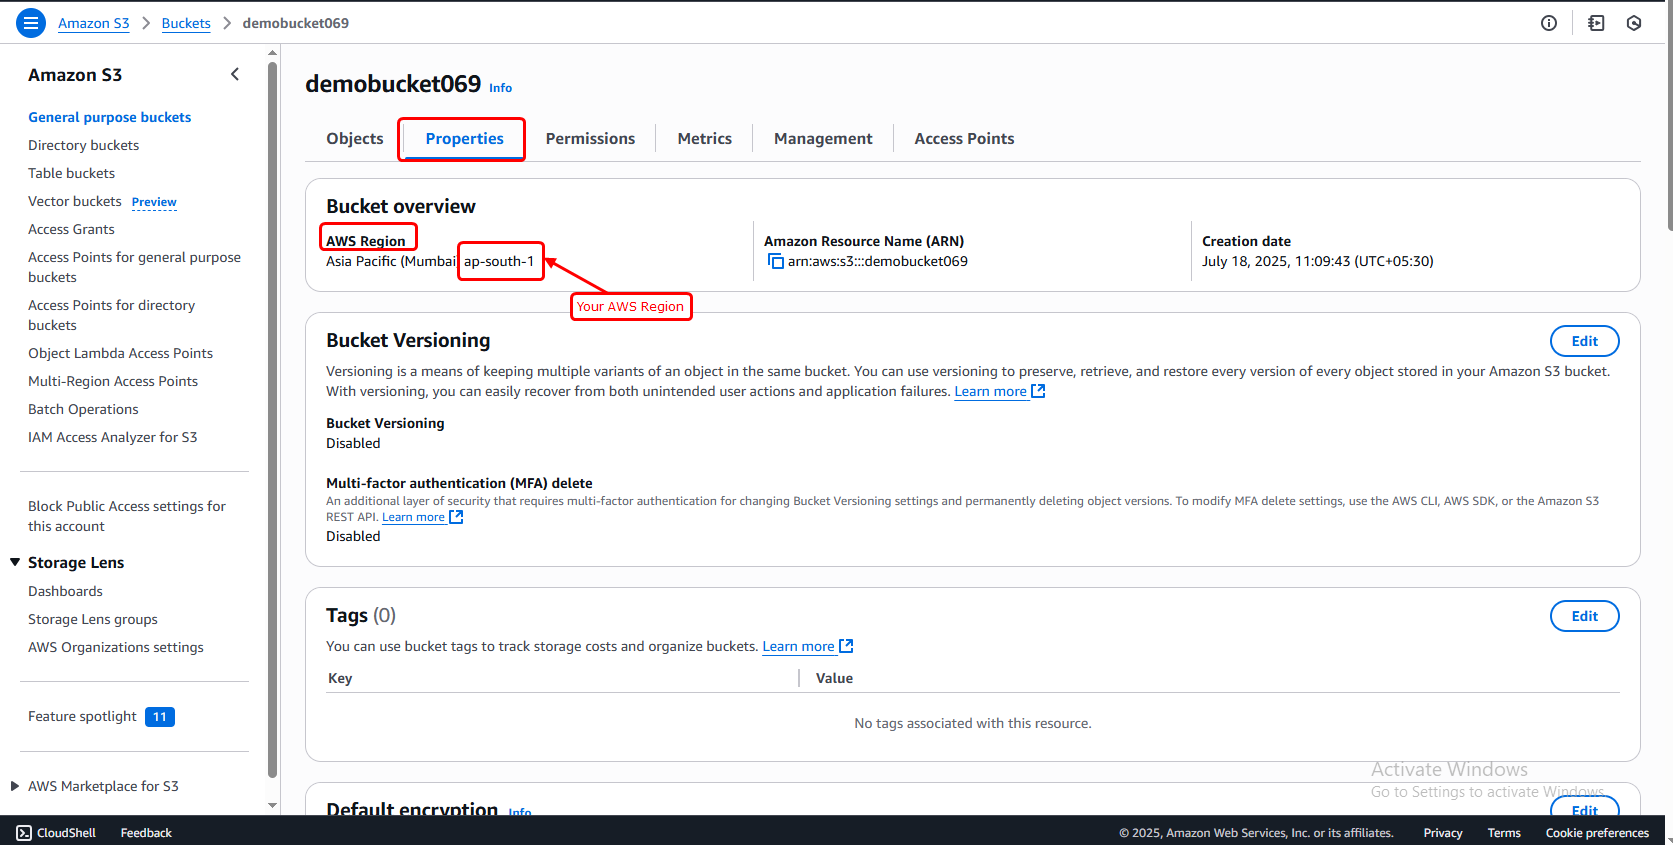
- Now you’ve successfully got your AWS_BUCKET and AWS_REGION values. (Refer to the image below)
- Go to the S3 section in your AWS account.
- You’ll see your bucket listed there.
- From this page, you can find:
-
AWS_HOSTNAME:
Format –
https://{bucket-name}.s3.{region}.amazonaws.comExample –https://demobucket069.s3.ap-south-1.amazonaws.com -
AWS_ENDPOINT:
Format –
https://s3.{region}.amazonaws.comExample –https://s3.ap-south-1.amazonaws.com
-
AWS_HOSTNAME:
Format –
- Now, make sure to keep those two credentials (AWS_ENDPOINT and AWS_HOSTNAME) safe. You'll need them to activate and use the AWS S3 storage in your project.
- Go to the search bar at the top of the AWS console and type “IAM”.
- From the results, click on the IAM service (as shown in the image below). Then, go to the "Users" section in the IAM dashboard.
- In the left sidebar, click on “Users”
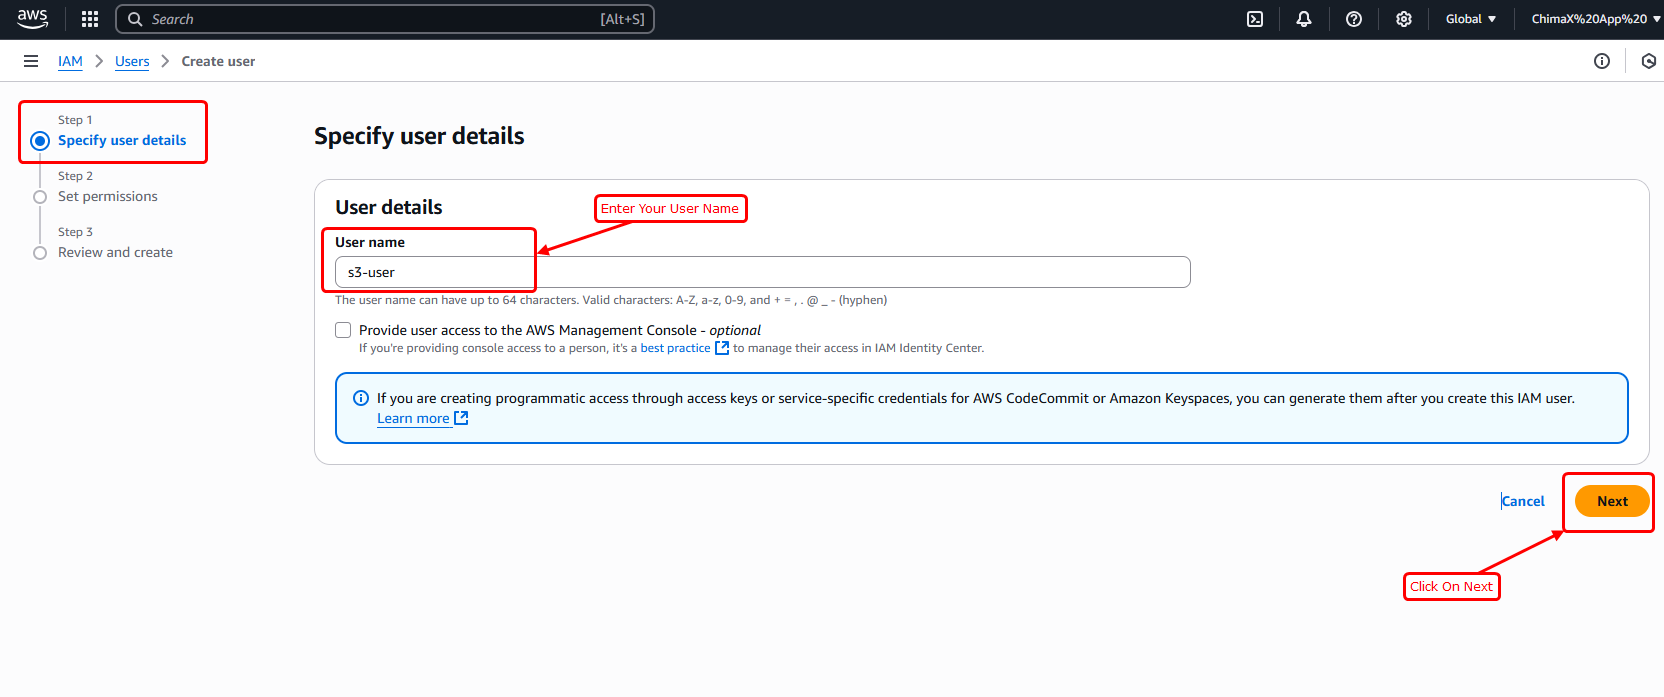
- Click on the blue “Add users” button
- Set a username (e.g., s3-user)
- Click Next (Refer to the image below)
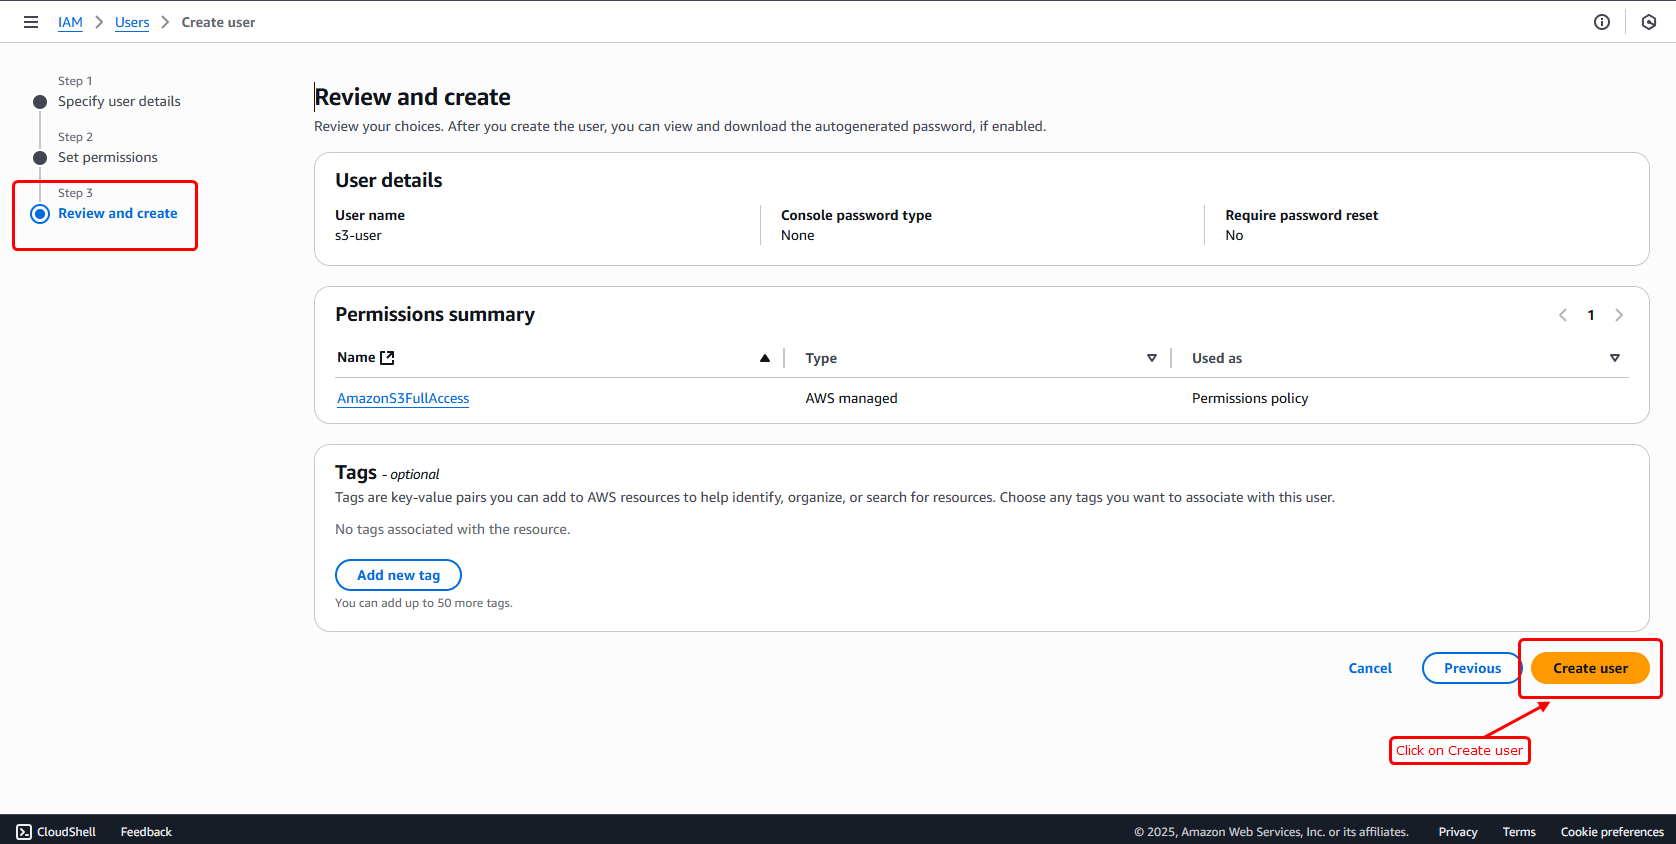
- You will see a step called "Set permissions"
- Choose Attach policies directly
- In the permissions step, type "AmazonS3FullAccess" in the search box, then check the box next to it to give full S3 access.
- Click Next
- In the "Review and create" step, click on "Create user".
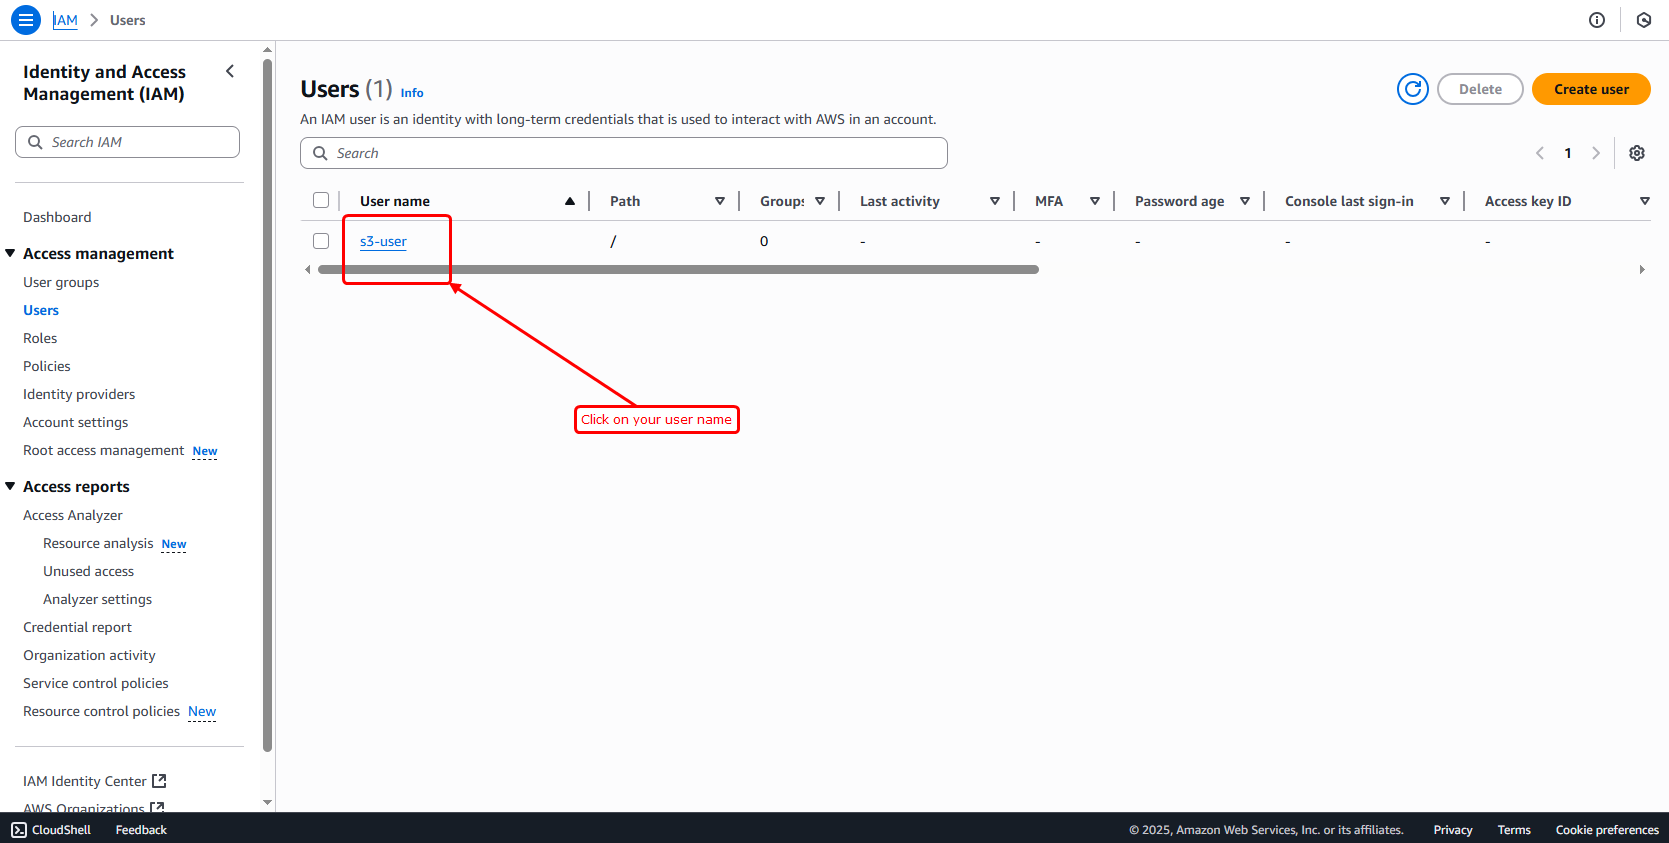
- Once the user is created, you will see them listed on the next screen. Find and select your new user from that list.
- Click on the user name
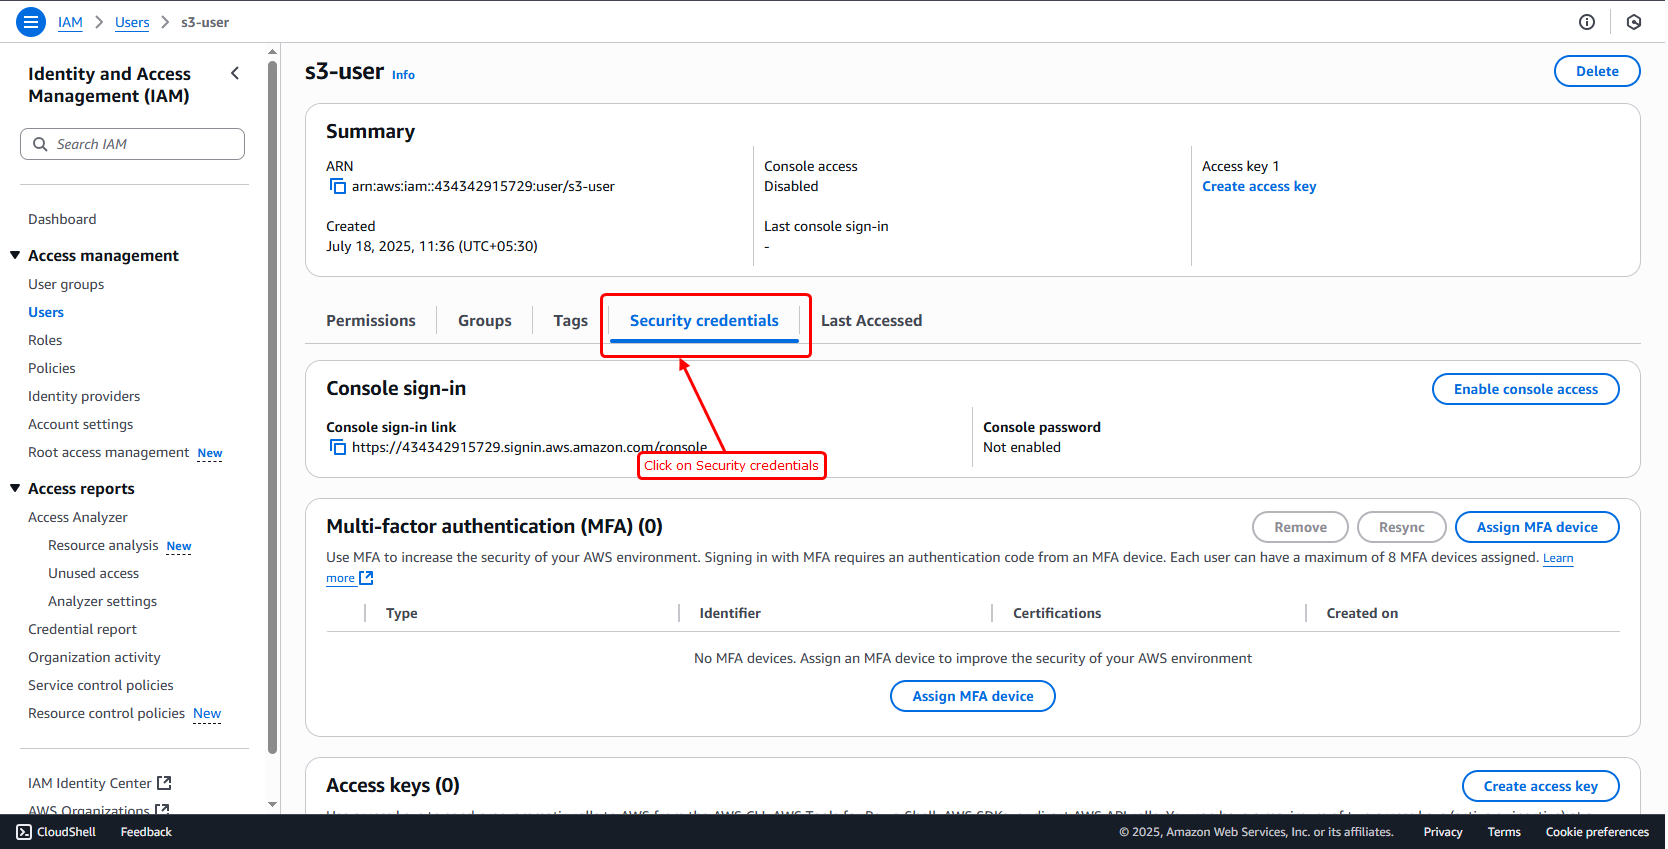
- On the user summary page, click “Security credentials” tab
- Scroll to the “Access keys” section
- Click “Create access key”
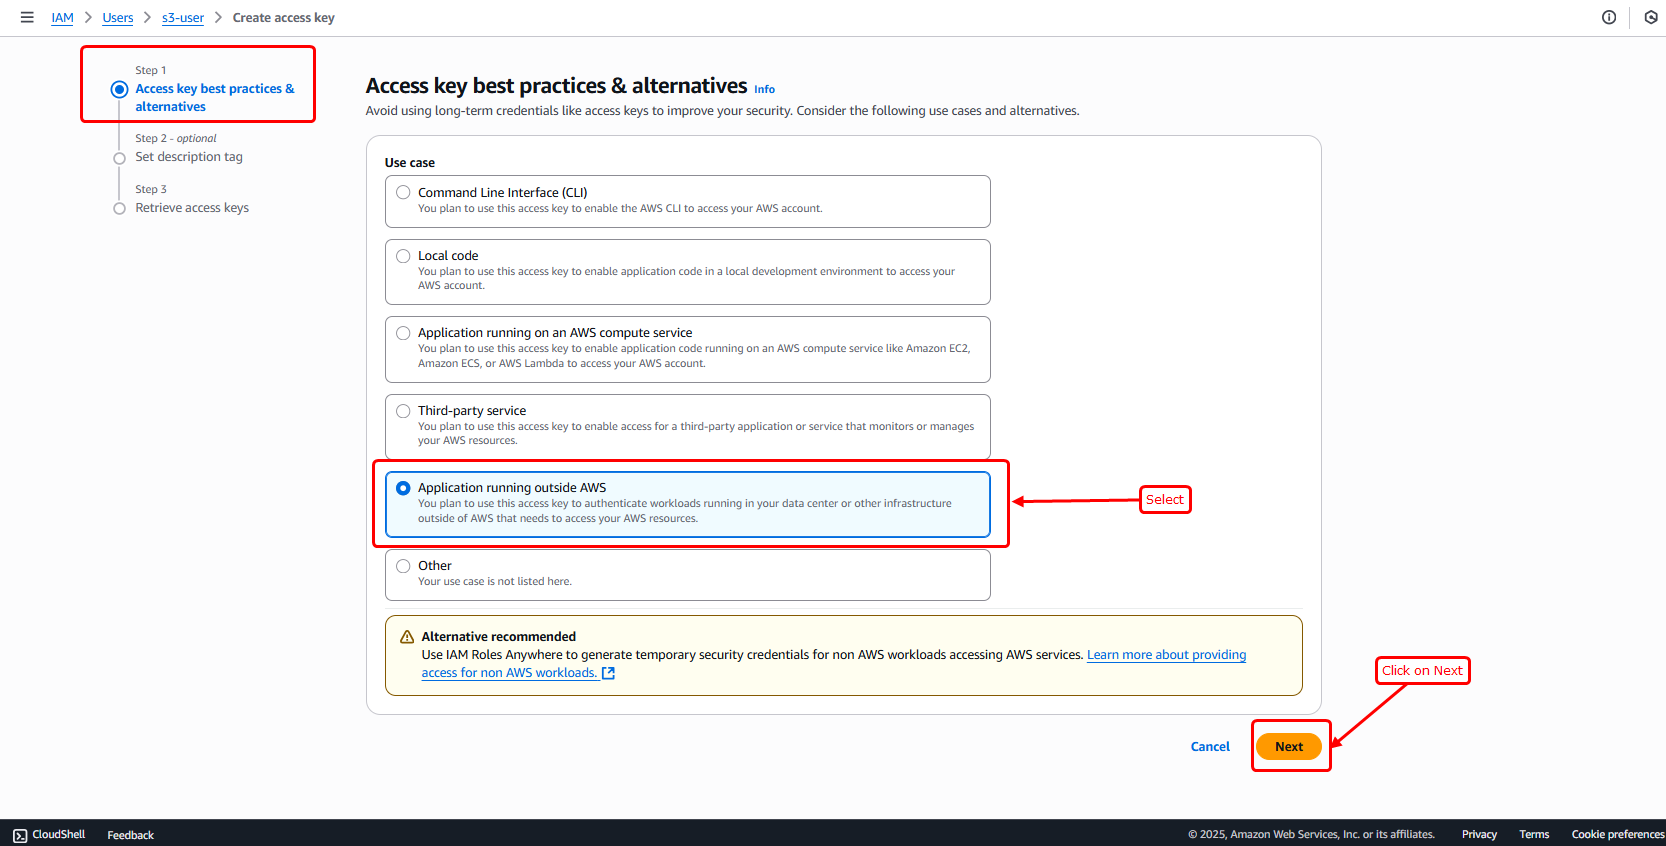
- Choose Use cases (select “Application running outside AWS”)
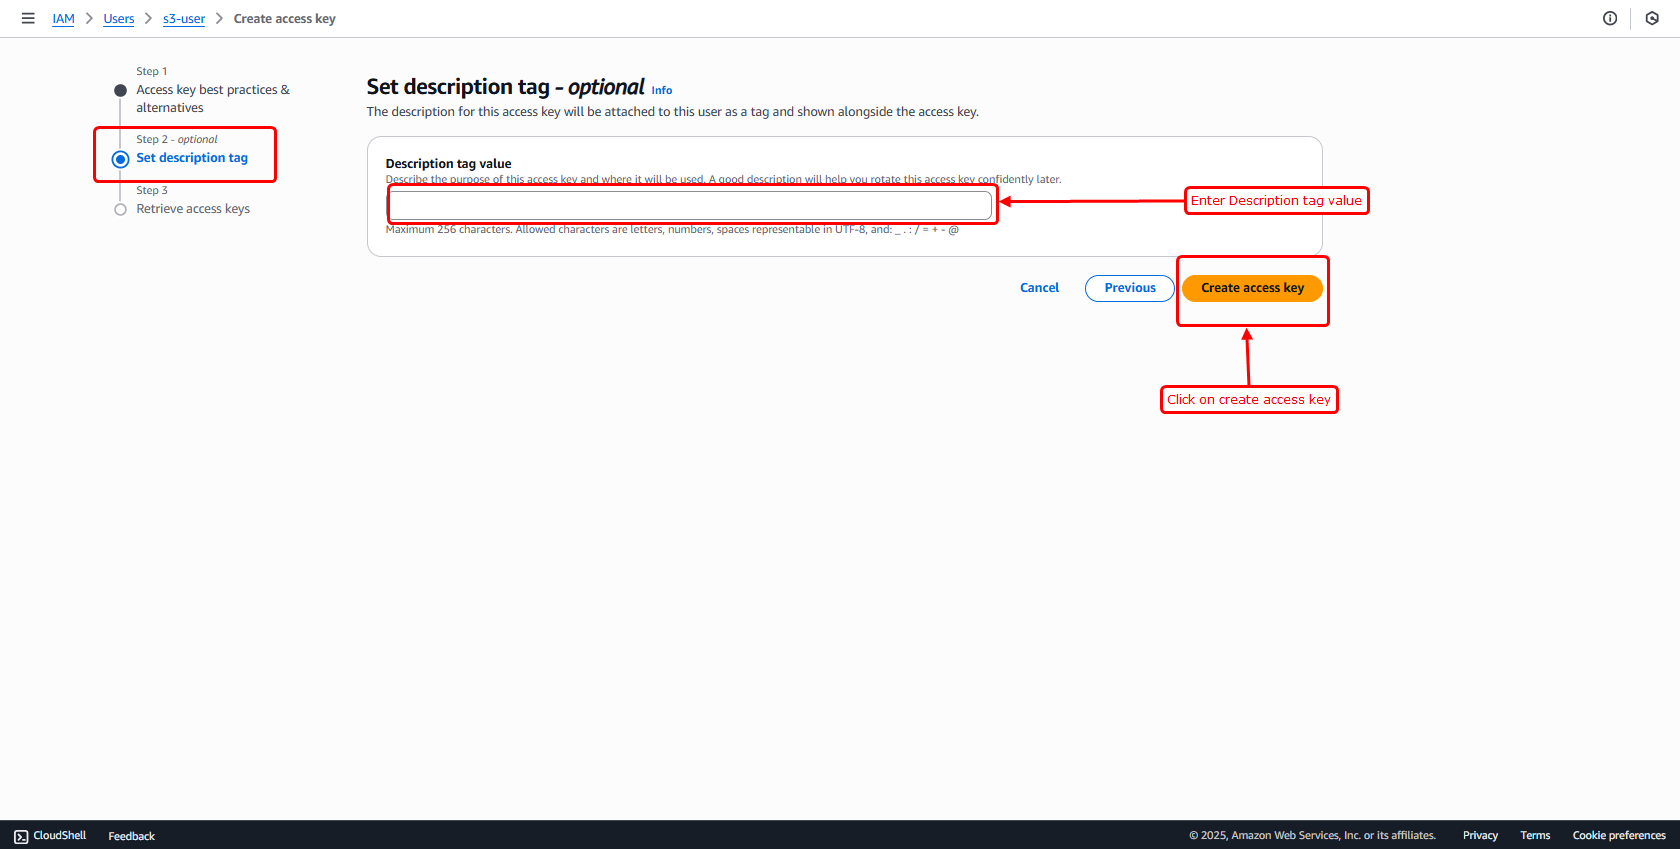
- Step 2: (Optional) You can add a description tag if you want, or just skip this step.
- Then Click On, Create access key
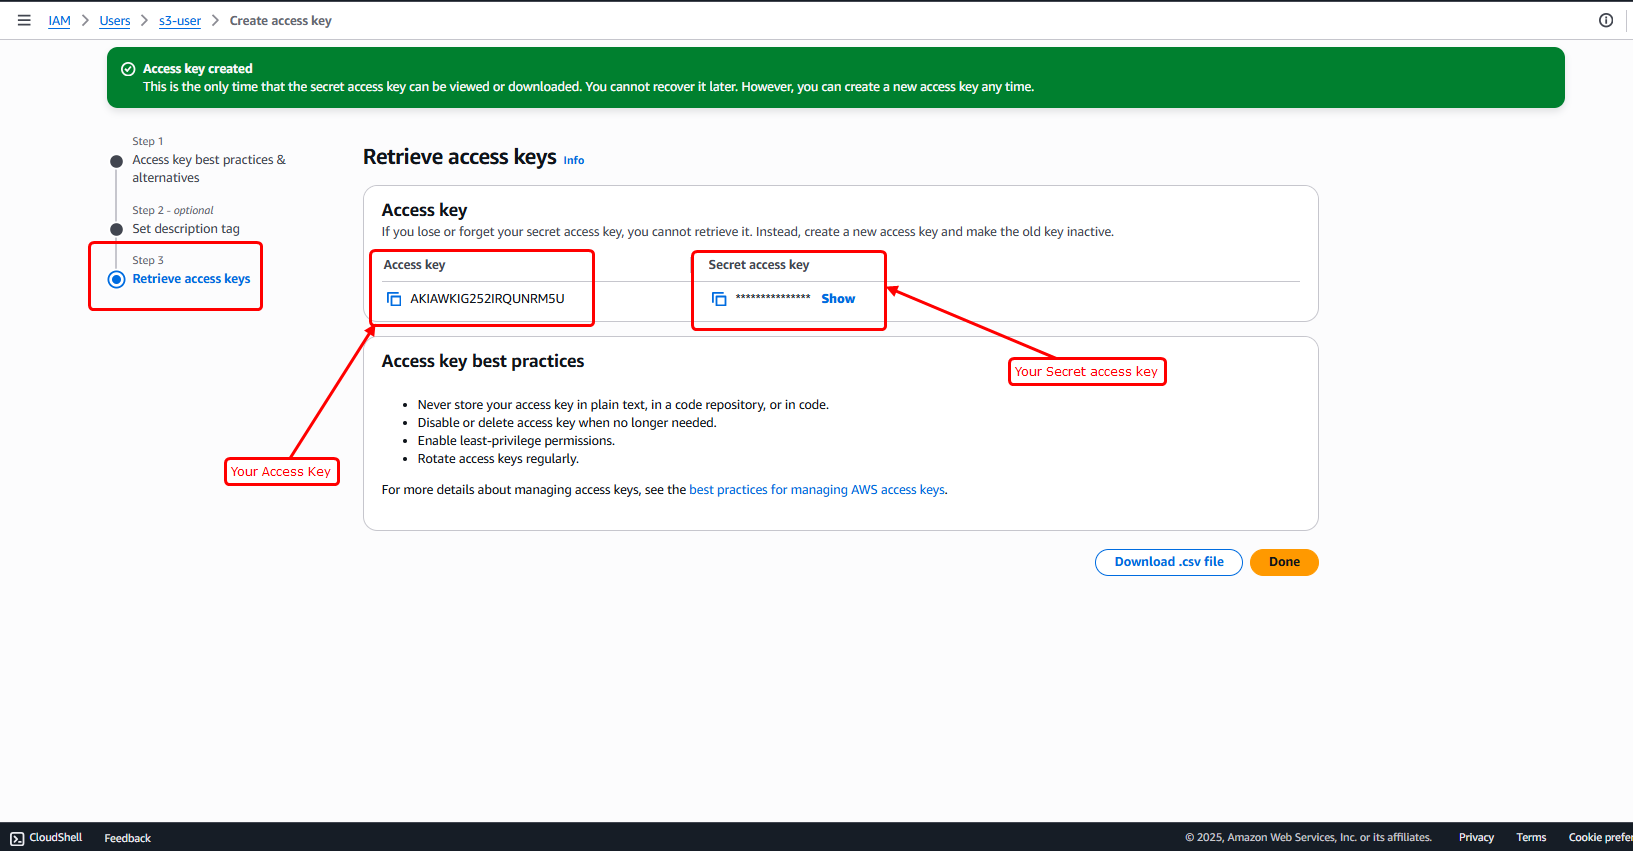
- You'll now see:
- Access key ID
- Secret access key
- Download the .csv file or copy both values securely — you cannot see the secret again later!
- Now the bucket is fully configured, and you have all the necessary details and credentials needed to start using it.
{
                        "Version": "2012-10-17",
                        "Statement": [
                          {
                            "Sid": "PublicReadGetObject",
                            "Effect": "Allow",
                            "Principal": "*",
                            "Action": "s3:GetObject",
                            "Resource": "arn:aws:s3:::demobucket069/*"
                          }
                        ]
                      }
How to get required credentials for AWS S3 bucket
Step 1 : How to get "AWS_BUCKET" and "AWS_REGION" from AWS S3 bucket
Step 2 : How to get "AWS_ENDPOINT" and "AWS_HOSTNAME" from AWS S3 bucket
Step 3 : How to get "AWS_ACCESS_KEY_ID" and "AWS_SECRET_ACCESS_KEY" from AWS S3 bucket